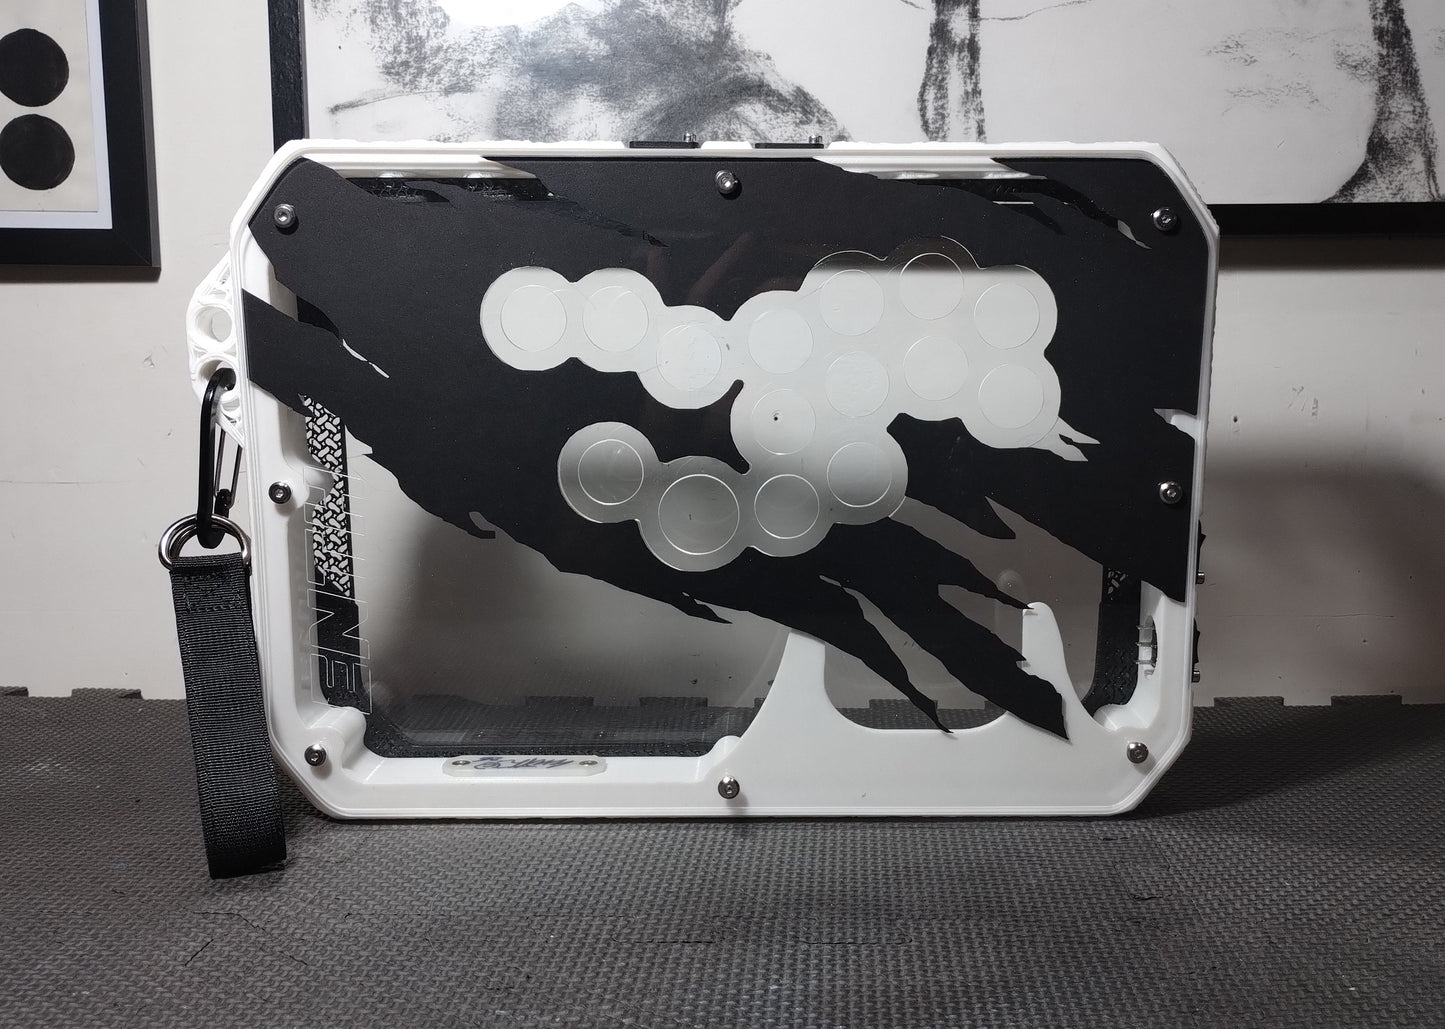
WYSIWYG - ATLAS SLIM CASE ONLY - White frame
WYSIWYG - ATLAS SLIM CASE ONLY - White frame
Couldn't load pickup availability
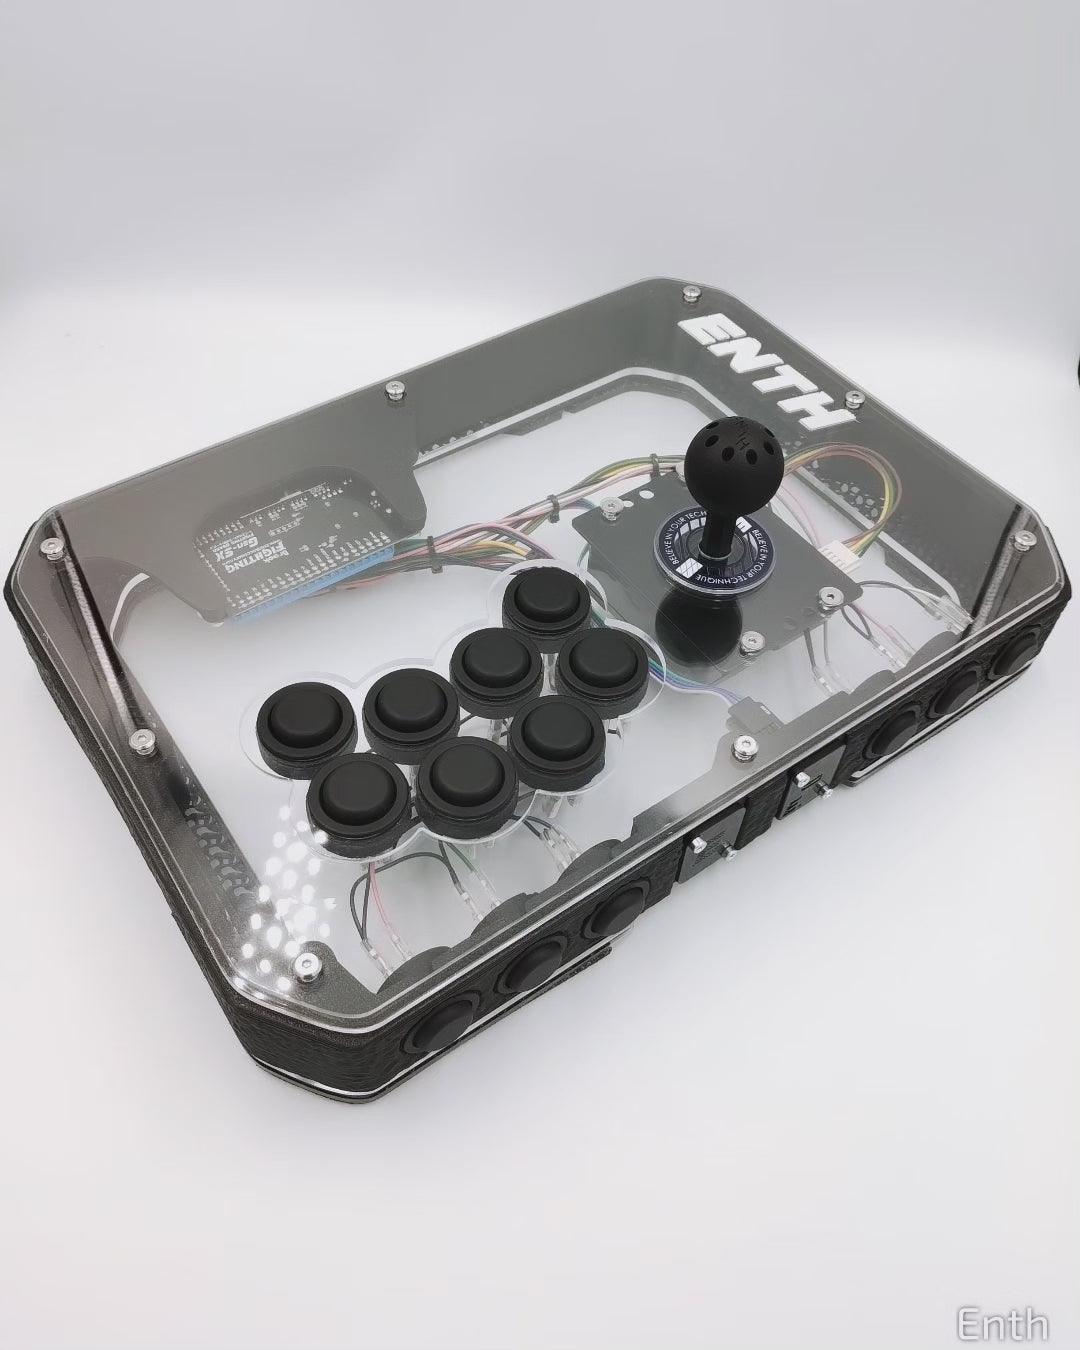
Wysiwyg. Single piece.
ATLAS slim V3. HOUSES ONLY. Layout Enth 15. WHITE FRAME, EXTRA WORN ARTWORK LAYER.
ABOUT THE PIECES IN STOCK:
- READY TO SHIP, THEY SHIP WITHIN A FEW DAYS OF PURCHASE.
- THE CONTROLLERS ARE NEW AND READY TO USE
- ANY IMPORT COSTS ARE THE RESPONSIBILITY OF THE BUYER.
Main virtues:
- FRAME VERSION 3.0 - PETG, REMOVABLE SIDE HANDLES, WRIST STRAP INCLUDED
- Attractive and ergonomic design , with a minimalist and industrial style.
- Large support surface, ideal for extended gaming sessions.
- High-quality materials, with a robust structure composed of a 3D-printed monoblock frame and plexiglass panels.
- Compatibility extended to snap-in and screw on buttons.
- Modular structure , internal space variable according to needs and components.
- Excellent quality/price ratio, in relation to the materials and components used.
COMPONENT COMPATIBILITY
- OPTION BUTTONS (6X24MM LOCATED ON THE TOP SIDE): 24MM SCREW-ON BUTTONS ONLY
- TOP PANEL BUTTONS (8X30MM): SNAP-IN BUTTONS (3.5mm or greater snap compatibility) AND SCREW-ON BUTTONS
- LEVER COMPATIBILITY : ALL LEVERS WITH A JAPANESE PLATE (JLF HOLES), WITH AN INTERNAL DIMENSION EQUAL TO OR LESS THAN 38MM. ALL JLF/JLX and clones, QANBA LEVERS, HORI HAYABUSA AND ALL KOREAN LEVERS WITH A SIMILAR INTERNAL DIMENSION ARE COMPATIBLE (THE CASE HAS A 35MM HOLE).
ENCLOSURE FEATURES
- Four Neutrik port slots.
- 35mm lever hole for compatibility with Korean levers.
- 2 upper plexiglass panels, one 4mm and one 3.5mm.
- Overall case dimensions: 37x26x5 cm.
- Weight of approximately 1.6 kg for the case and approximately 2.5 kg for the assembled arcade stick.
- Internal space of approximately 41mm, expandable up to 46mm thanks to the extra layers not included
What's included:
- 1 complete house
- 1 USB-C Enth port with 4 pin 2.54 cable.
- 1 Dustwasher Enth 43mm
- 1 Layer of cardboard with PHANTOM design
- all the screws needed to complete the enclosure, including those from the PCB.
What's not included:
- Buttons, wiring and PCB are not included.
- Users must procure the necessary components to complete the build, such as PCBs, buttons, and Brook wiring or custom wiring.
Customization - Download templates to create your own custom panels (Artworks)
https://mega.nz/folder/lQBgFJYD#ZkOykBcCRmYTzaDkBELHYg WIRING - HERE'S AN ADVANCED GUIDE ON CREATING CUSTOM WIRING:
UKFM WIRING GUIDE
Processing and shipping times
Ready to ship. In stock. Ships from our warehouses within 48 hours of ordering.
Contact us
If you have any questions or need clarification, we're always available.
We reserve the right to make improvements to the case to ensure consistently optimal quality and performance.
We thank Nelmsii for the support on the compatibility of the Korean sticks and BattleMonkey for the valuable advice on the final refinements.
Buy now and discover the gaming experience that only the Atlas case can offer!
Enth Atlas Slim V2.5 Enclosure Assembly Guide
Step 1: Install the Side Buttons
- Mount the side buttons to the frame before attaching the top and bottom panels.
Step 2: Attach the Top Panels
- Fix the two top panels to the frame.
- If you use artwork , place it between the first and second levels before screwing the panels together.
Step 3: Assemble the Buttons and Joystick
- Mount the main buttons into their respective holes.
- If necessary, install the joystick using the provided screws.
Step 4: Assemble the Fighting Board and Wiring
- Securely fix the fighting board .
- Connect the buttons and joystick to the terminals on the fighting board.
- Organize cables neatly using cable ties or similar methods.
Step 5: Functional Testing
- Connect the controller to a device and check that all buttons and the joystick work properly.
- Please resolve any issues before proceeding.
Step 6: Closing and Completion
- Close the enclosure by securing the bottom cover.
- If you're happy with your build, feel free to take a picture of your controller and share it on Twitter or Instagram —we'd love to see it!
Disassembly
- To replace the side buttons, loosen the screws on the top panels to give yourself more room to maneuver.


Let customers speak for us

The perfect product where feel, art, and functionality come together.
It’s truly a work of art.
Very excellent buttons. The material of the buttons feels amazing, but I was not a big fan of the Kalih Speed Silver switches in the buttons by default. However, with the V3 ENTH buttons being hot-swappable, I changed them to Kalih Saker MX switches and the buttons feel perfect now.
These ENTH KRM buttons are absolutely top-notch! Worth every penny. The build quality is extremely premium, and the tactile feel is just unmatched. Every time I press the button, the material is high-end, and the responsiveness is flawless. It really stands out compared to other buttons I’ve used before. If you're looking for quality and precision, these are definitely the ones to get!

Increíble calidad artesanal. Me encanta esta caja, llevaba mucho tiempo detrás de ella y elresultado es perfecto. Muchas gracias

Everything as described, thank you.
Muy bien super mucha gracias excelente producto
Unique buttons with a great feel and sound. When a logistics error caused a shipment delay, customer service went above and beyond to make things right.
Really nice buttons - very responsive and not too hard on the fingers. I enjoy using these over Gamerfingers or SANWA.

Great, lightweight, solid

The topper is great, the best topper I ever had I loved it is everything that I ever expected, super light the inertia is at minimum and it improves movement a lot best topper ever thanks for make it happen

I was worried that the stick was a lemon because the top buttons would not work for start and select, but it was fixed after some tinkering on the GP2040 site. The wood top panel is a work of art, and the lever feels smooth in motion. The best parts of this stick are the buttons. These are the best feeling and sounding buttons I have played with. I have used Sanwa, Qanba Gravity KS, and Haute Crystal switches and while those are good, these Enth buttons really are the most pleasant to press and hear. I now regret not picking up one of the PS5 compatible Atlas Slims when they were available and hope the shop will reopen soon.

Excelent products and service as allways.

とても実用的で高性能なアーケードコントローラーで、デザインや形状が本当にクールでかっこいい!!
KRMボタンの押し心地は最高で長時間のゲームプレイでも疲れることはありません。こんなに素晴らしいアーケードコントローラーをこの良心的な値段で手に入れられたことを感謝しています。

かっこいいからみんなつけてみて!
I’ve been following ENTH Creations for some time now and was already aware of their products as the KRMs are a godsend of a button. But I wasn’t prepared for the ATLAS slim. I mean I knewI was getting a quality controller but even this exceeded my expectation. Extremely comfortable, incredibly responsive and acoustically satisfying.And the artwork finish is nothing short of breathtaking. I can’t wait to take this out to a tourney and get asked all the questions about it so I can spread the news about this product and company.If you want quality then you want ENTH. They’re one of the few this much is for certain.!
Collections
-

MURAKUMO CORP.
STYLISH, HIGH QUALITY ACCESSORIES, DIRECT FROM JAPAN